
Mark your calenders and contact your teams. The annual Tom Smith Jr. Golf Tournament will be held at Emerald Greens Golf Course. This years tourney is on Saturday July 18, at 1:30 pm. This will be a shotgun start and a 4 man scramble rules tournament.
HAVE A RICH AND PROUD HISTORY, DEEPLY ROOTED IN THE AMERICAN UNION MOVEMENT.
![]() Emerald Greens Golf Course, our roots are planted deeply with the Plumbers and Pipefitters Eastern Missouri Local 562. It was 562 union leaders decades ago who envisioned a campus-like setting for not only their work, but for recreational endeavors — even for a retirement option for it retirees.
Emerald Greens Golf Course, our roots are planted deeply with the Plumbers and Pipefitters Eastern Missouri Local 562. It was 562 union leaders decades ago who envisioned a campus-like setting for not only their work, but for recreational endeavors — even for a retirement option for it retirees.
In the 1960’s, Lawrence Callahan and “Doc” Lawler were the business managers for 562.
Lawrence had a dream to have a property for union members that would include a country club, pool, health center and union offices all on one property. Straight away, all of that dream came to fruition except for the golf course. Through the years it also came to include fishing, swimming, and picnicking
 The union moved along for a few decades with a facility that was the envy of many companies – not just the other local unions. For a time the campus even included a retirement center for its retired members.
The 1990s brought in a new business manager who decided it was time to build the golf course. Jim Cochran Sr. was hired to design and build the course and run the golf operation. So it was that Emerald Greens opened on August 10, 1994 for the enjoyment of union members and public play, too.
Today the crowning jewel of the Union’s campus is the 18 holes of Emerald Greens, a gorgeous golf course that wraps around the 400-acre  campus. All golfers are welcome to Emerald Greens – with or without a union affiliation.
HOLE BY HOLE
| Hole | 1 | 2 | 3 | 4 | 5 | 6 | 7 | 8 | 9 | Out |
| Blue | 356 | 371 | 148 | 500 | 405 | 157 | 562 | 164 | 388 | 3051 |
| White | 326 | 350 | 128 | 468 | 378 | 136 | 544 | 142 | 366 | 2838 |
| Silver | 304 | 278 | 105 | 433 | 342 | 116 | 491 | 131 | 303 | 2503 |
| Red | 284 | 253 | 88 | 416 | 338 | 98 | 488 | 115 | 300 | 2380 |
| Par | 4 | 4 | 3 | 5 | 4 | 3 | 5 | 3 | 4 | 35 |
| Handicap | 9 | 3 | 15 | 5 | 7 | 17 | 1 | 13 | 11 |
| Hole | 10 | 11 | 12 | 13 | 14 | 15 | 16 | 17 | 18 | In | Out | Total |
| Blue | 444 | 380 | 207 | 398 | 396 | 197 | 530 | 167 | 506 | 3225 | 3051 | 6277 |
| White | 425 | 354 | 189 | 369 | 358 | 181 | 506 | 153 | 483 | 3018 | 2838 | 5856 |
| Silver | 372 | 320 | 143 | 333 | 312 | 160 | 478 | 86 | 455 | 2659 | 2503 | 5162 |
| Red | 369 | 318 | 115 | 325 | 288 | 142 | 452 | 71 | 394 | 2474 | 2380 | 4854 |
| Par | 4 | 4 | 3 | 4 | 4 | 3 | 5 | 3 | 5 | 35 | 35 | 70 |
| Handicap | 4 | 10 | 16 | 12 | 8 | 18 | 6 | 14 | 2 |
| Tee | Rating | Slope |
| Blue | 70.9 | 129 |
| White | 69.6 | 125 |
| Silver | 67.7 | 121 |
| Red | 68.1 | 123 |
Hole #1
Par 4 – Handicap 9
This straight away par 4 with trouble down the right side gives you a good chance at an opening birdie. Tee shot needs to go down the middle left with a fairway wood or hybrid. Leaves a short iron to a small kidney shaped green.
Hole #2
Par 4 – Handicap 3
Pay extra attention to the drive on this 90 degree dogleg right. A tee shot of 180 to 220 yards toward the directional flag will leave you with a mid-iron approach. The green is protected by water in front so make sure you select enough club for your approach.
Hole #3
Par 3 – Handicap 15
Number 3 is the first of our six par three’s and doesn’t command anything more than a mid-iron even from the back tees. Pay close attention to the pin placement on this two-tiered green and avoid a miss right. When the pin in on the back tier most players will need to use one or two clubs more than when the flag is on the bottom tier.
Hole #4
Par 5 – Handicap 5
The first par 5 of the course can be an easy birdie with a big drive off the tee. Most players that reach the top of the hill will be able to go for the green in two. If not, try to layup short of the bunker to the left of the fairway for a short iron approach.
Hole #5
Par 4 – Handicap 7
A tough par 4 dogleg right that allows for a true risk reward. Drive over the trees and bunkers on the inside right part of the dogleg to attack this green with a short-iron or lay up left and play a mid-iron to long-iron approach.
Hole #6
Par 3 – Handicap 17
After the tough #5 come to this short “easy” par 3 with a chance to redeem yourself. Avoid the pot bunker short but avoid going long even more.
Hole #7
Par 5 – Handicap 1
The #1 handicap, a long and narrow par 5 cut through dense trees will require a precise tee shot. After you have safely navigated off the tee a lay-up short of the fairway bunkers will leave you with a mid- to short-iron approach to a narrow green. It’s no coincidence that this hole is 562 yards from the tips as the course is owned by the Plumbers & Pipefitters Local 562 Union.
Hole #8
Par 3 – Handicap 13
Keeping with the common theme of following a hard hole with an easier one doesn’t change with the 8th. This par 3 can be deceiving however as it plays up hill and most players will need to take one additional club to avoid the deep bunker in front.
Hole #9
Par 4 – Handicap 11
We end the front 9 with a straight away par 4. It is a true grip it and rip it hole with a large fairway and trouble only coming into play on the second shot. Depending on the drive most players should be able to play a short wedge into this green.
Hole #10
Par 4 – Handicap 4
The second 9 begins just as the first 9 holes ended with a straight away par 4. Unlike #9 this hole has some length to it and players must avoid the tree line and out of bounds right. Once you have split the fairway it should leave a mid- to long-iron shot into the green.
Hole #11
Par 4 – Handicap 10
With a slight dogleg right this up hill hole requires a drive avoiding the bunker to the right of the fairway. A good drive should leave a mid- to short-iron approach to a green that strongly slopes from back to front.
Hole #12
Par 3 – Handicap 16
On paper the 12th hole is the longest par 3 of our six but the downhill shot will require one less club than the yardage. Make sure you stop to enjoy the view on the tee box and be sure to read the subtle breaks in the green.
Hole #13
Par 4 – Handicap 12
Driving is a premium on this straight away par 4. Bunkers both left and right of the fairway require a precise tee shot if you want to take advantage of the short to mid-iron approach.
Hole #14
Par 4 – Handicap 4
Stay right on this the only dogleg left on the course. Water protects the front of the green and any shot straying too far left off the tee.
Hole #15
Par 3 – Handicap 18
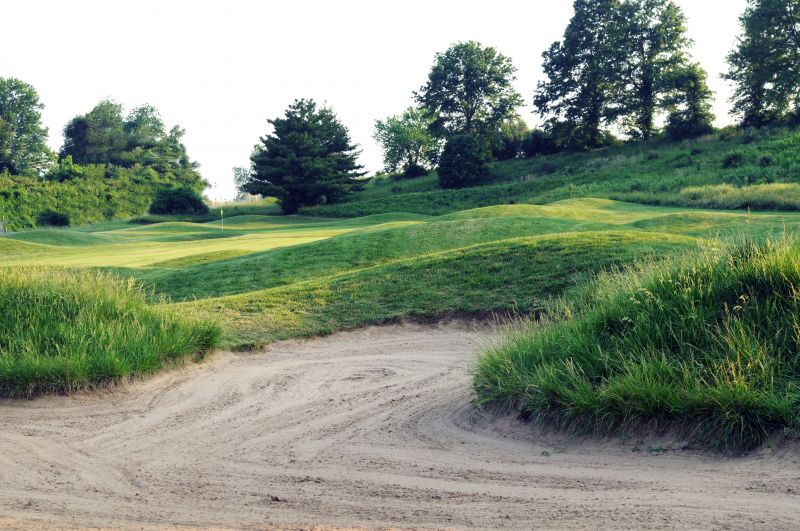
The beginning of our par 3-5-3-5 finish that can make or break a players round is the easiest hole on paper but it doesn’t necessarily play that way. At 197 yards from the back tees this long-iron tee shot must avoid bunkers on both sides of the green and it plays longer than it looks. Par is a good score to start this stretch of closing holes.
Hole #16
Par 5 – Handicap 6
As the easiest par 5 on the course number 16 still ranks as our #6 handicap. At 530 yards from the back tees it is still reachable for some players. Keep your second shot left of the green, even if you are going for it in two, because the lay of the land will give you a “members” bounce toward the hole.
Hole #17
Par 3 – Handicap 14
A hole surround by water on two sides makes for a premium on the mid-iron tee shot for this hole. Aim for the middle of the green and the ball will typically feed toward the hole. If the pin is in the back right most people will consider it the toughest shot on the course.
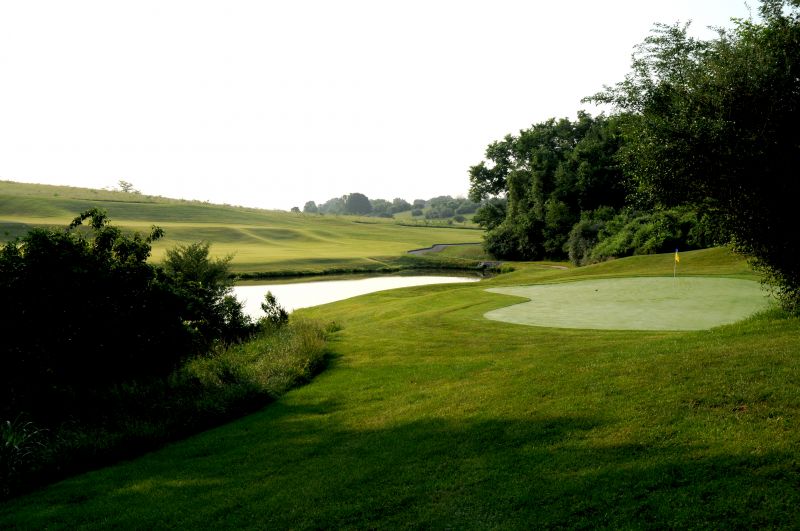
Hole #18
Par 5 – Handicap 2
A true test of a finishing hole awaits the end of your round with this difficult par 5. It requires you to carry two bodies of water both on your tee shot and layup. Hit your drive about 200 yards off the tee toward the directional flag in the middle of the fairway. The closer to the green you try to put your lay-up the smaller the landing area becomes so stay try to stay well back. From there your approach should be a short- to mid-iron to an elevated and well protected green.
